You may not be aware of this, but I'm a sucker for process. I *love* learning. Once more, I *love* learning even more when it involves digging my hands into some new-to-me art or craft endeavor. Difficulty levels mean little when pioneering into unknown creative territory. Beginning, intermediate, advanced...what's that??? I like to just jump in feet first and deal with the challenges along the way. It's true, this method of exploration is not for the faint of heart, but it works for me. That said, I'm definitely not opposed to easy processes either. Easy processes are fun and have proven to be just as rewarding as the not-so-easy fair.
Enter my foray into needle felting!
Not only is needle felting unbelievably simple, but it's inexpensive too! Oh, and I get to work through my
issues by repeatedly stabbing extremely sharp implements into stuff. Vewry, vewry therapeutic.
Other than working through my apparent homicidal feelings toward wool, why needle felting you ask?
Well, I desire to create embellishments for my knitting and crocheted pieces that utilize the same material (generally wool) without using the same process(es) to create said accoutrements. I also endeavor to give my hands a break from needling and hooking due to the associated soreness I tend to experience at overwork of the wrists and digits. In addition, I purchased the tools and materials last summer for my progeny, so no further expenditure needed. So, why not create felt with needles?
Ahem, let's get down to the 411 of felting with needles shall we?
Okay, let's talk materials!
First you need roving. Wool roving seems to be the material of choice for needlus feltus. I purchase mine from
here.
Second, you need needles. Not just any needles, but
needle felting needles. These type of needles tend to be sharper, longer and have a little "handle" at one end so the felter can get a grip, so to speak. Also, needles can be grouped into larger settings called
punches. Punches are good for felting large areas.
Lastly, you'll need a high density foam pad which can be obtained at many of the same resources that sell needles.
Got yer stuff? Okay, let's start stabbing! Um, I mean felting...
Boys and girls gather your materials for we will be making flat, felted eyeballs today.

Oh come on! When embarking upon new crafty journeys one ensures a measure of success when sticking to imagery one feels comfortable with...Sheesh.
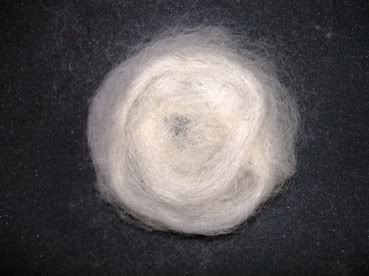
Step One:Place a few layers of roving atop foam pad in the shape of a circle thusly...
 Step Two:
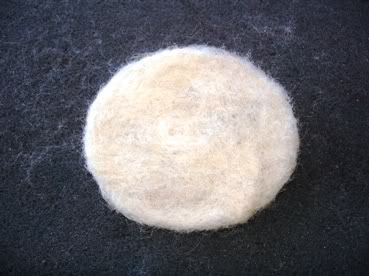
Stab the hell outta of roving circle with punch, turning piece over ever so often to prevent circle from felting to pad.

Stab until circle looks something like this...
 Step Three:
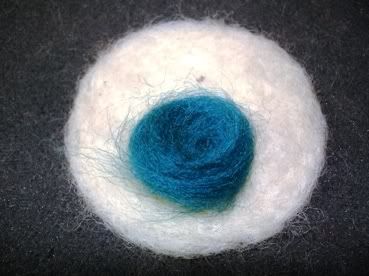
Add a circular layer of iris color roving to felted white of the eye.
 Step Four:
Stab away with single needle!

Is this not fun???
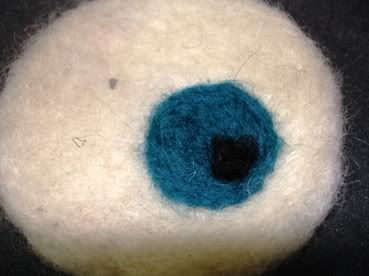
Step Five:Repeat steps three and four to affix pupil to newly fashioned flat ball.
 Step Six:
Take small amounts of vein colored roving and twist into an elongated strip. Place onto white of eyeball in a vein-y sort of shape.
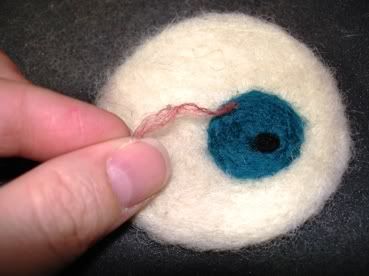 Step Seven:
Stab vein with single needle, working it into the white portion of eyeball.
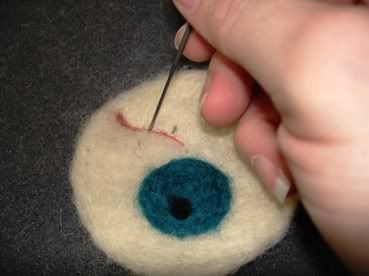
Repeat steps six and seven until desired amount of veins are worked into surface of ball.
Ta Da!
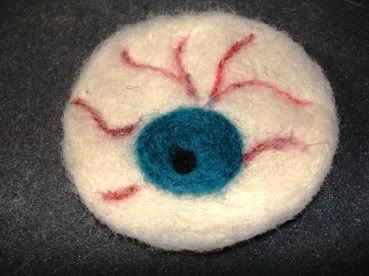
Stabbing, um I mean needle felting, is fun!
Copyright 2007 Regina Rioux Gonzalez. All rights reserved.




